
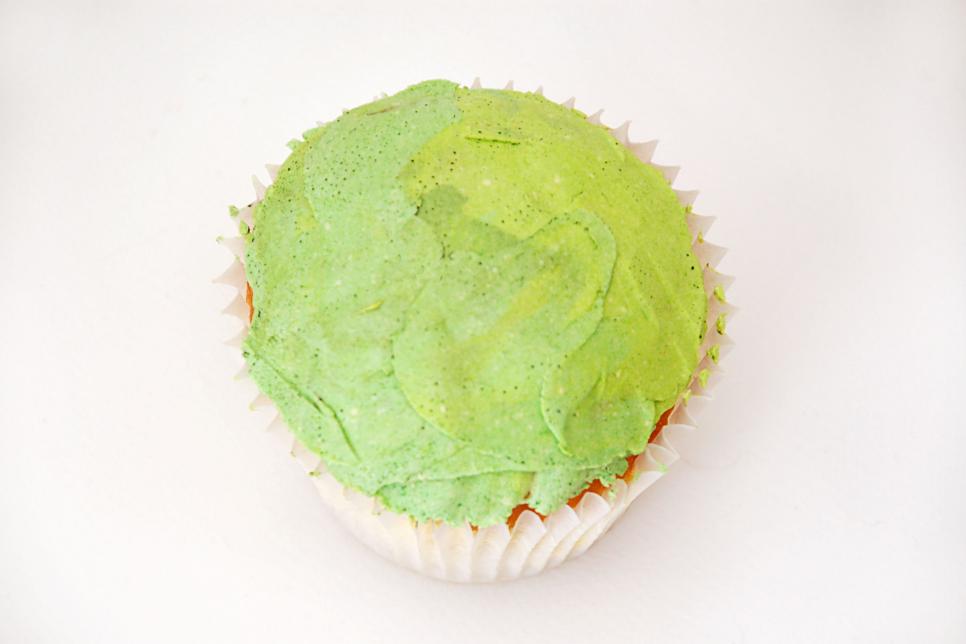
Cupcake Base To make your cupcake backyard the first thing you need is cupcakes! Any taste or type will work, select your favorite. Whenever your cupcakes are cool you'll need to give them all a base coat of green, buttercream icing. We suggest beginning with a white or pale yellow icing and adding just a little bit of food coloring to get the perfect color of green.
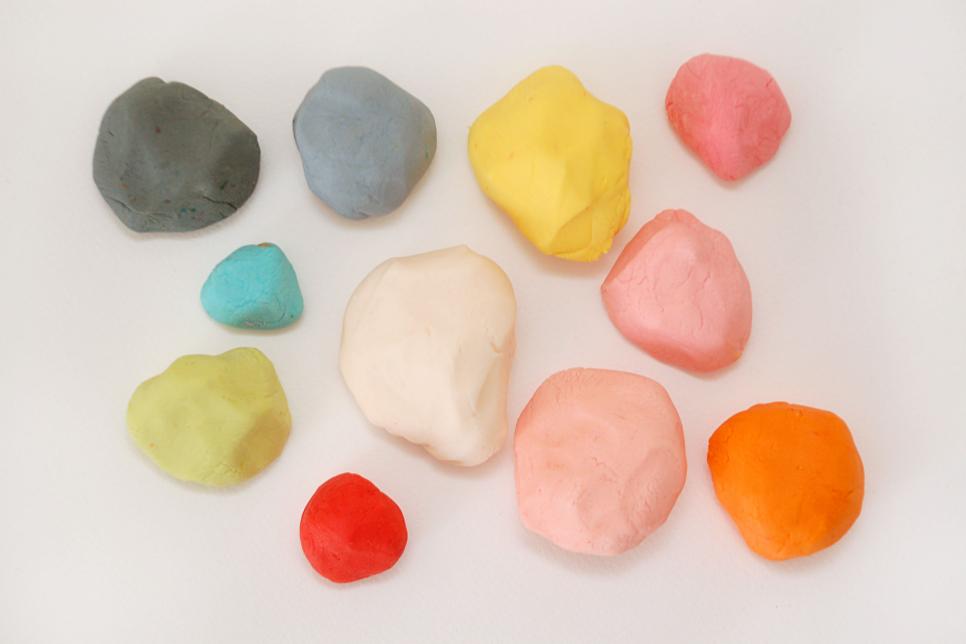
Fondant Once your cupcakes are iced you will require some fondant to produce the toppings. It is possible to purchase ready-made fondant or use your favourite recipe. Start with white fondant and also add a couple drops of food coloring to get your desired color index More Help. You may make as many or as few colors as you would like, we used pink, white, green, red, orange, yellow and grey for ours. Knead the fondant before the shade is spread throughout. If you find that the fondant gets too sticky at any point simply knead in a little bit of powdered sugar. Should you need to save some fondant for a day or 2, wrap it with plastic wrap and store in the refrigerator.
Straightforward Petals Produce these easy petal shapes by rolling a sheet of paper, about an eighth of an inch thick. Use a cookie cutter or sharp kitchen knife to cut a series of narrow petal shapes. The amount of petals you'll need will depend on the size of your cupcake and how complete your want your flower to be.
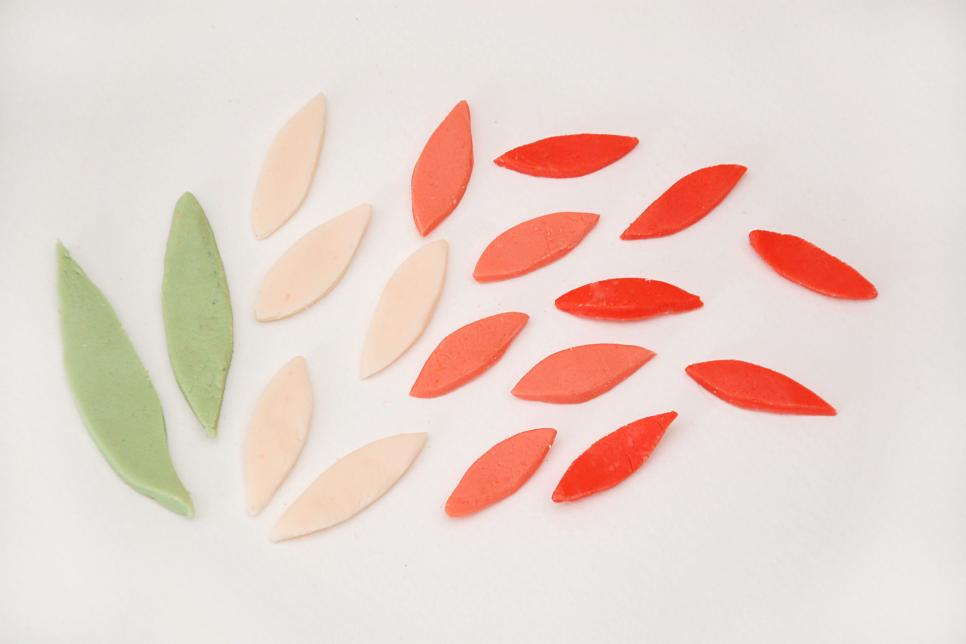
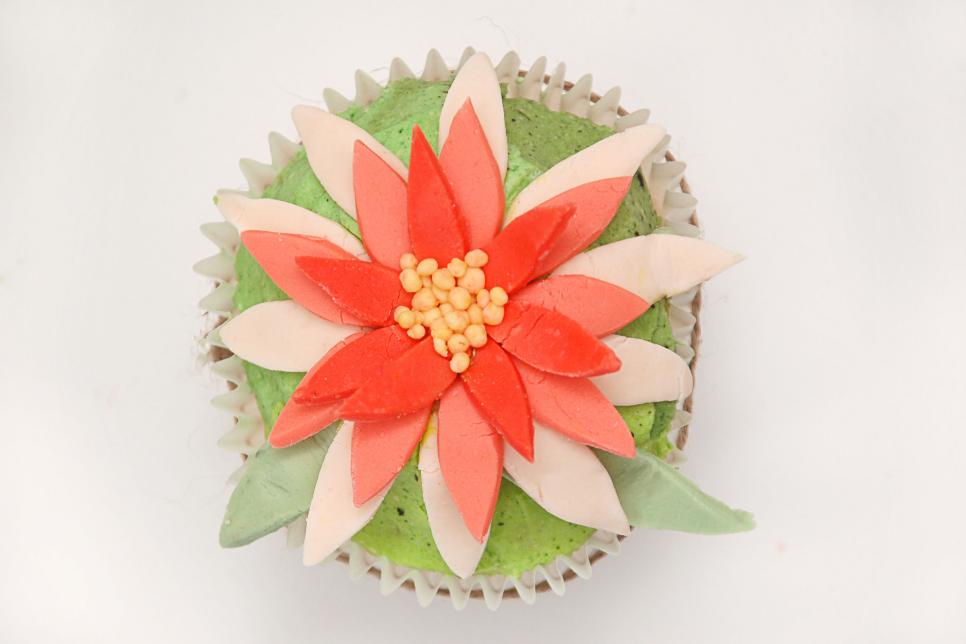
Laying on Petals We used 10 light pink petals, 9 dark pink petals and 7 reddish petals for this flower. Simply lay them down coating, pressing them into the icing at the middle. Finish by placing a few little chunks of jelqing at the center or utilize a dollop of icing covered in dragee sprinkles (the large round ones).
Including a Ladybug You may use the exact same simple petal technique in a whole new way by turning your blossom into leaves and including a ladybug. To create a lady bug, roll a piece of red fondant in an oval shape. Produce a smaller grey oval for the head and little dots of grey for your ladybug's spots.

Ladybug and Leaves Cut your petal shapes out of green fondant rather than pink and coating up the leaves. Put all of your lady bug pieces together and place the ladybug at the middle. If your fondant gets too dry and does not want to stick, brush a very small bit of water on or use sandpaper to maintain the pieces together.

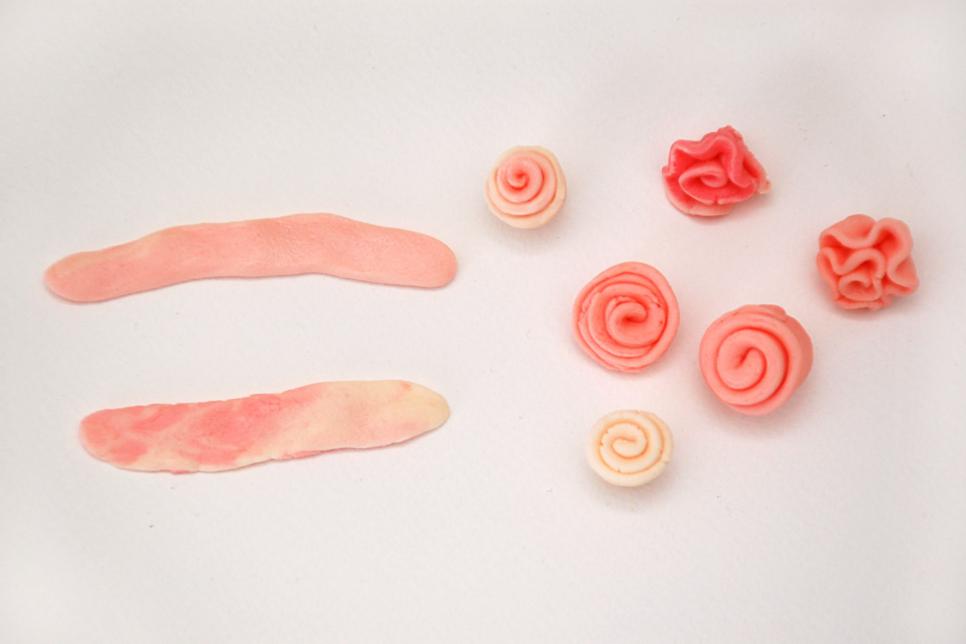
Little Flowers Rolling fondant into spirals is just another very simple way to create edible flowers. Roll out a sheet of fondant and cut or split out long strips out of it her response. Roll the strips up to create tight spiral roses. You can also try rolling the strips more loosely to create the effect of ruffled petals. Try out marbling two distinct colors together at a strip to create a variegated effect in your flowers. Simply knead to colors together, quitting before they mix completely.
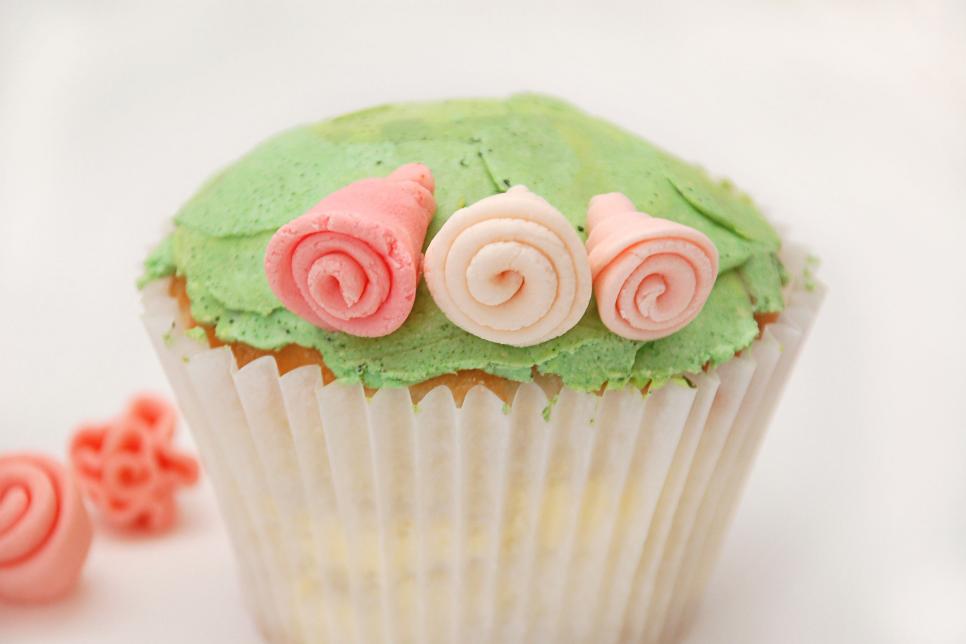
Arranging Rolled Roses Organize the flowers by placing a ring around the outside border of the cupcake, with the cap of the flower facing outside . Try mixing different shades and colors together.
Completed Bouquet As soon as you have the base ring, stack more flowers on top until you've covered the whole surface of the cupcake Get the facts i loved this Clicking Here. Form little leaf shapes with your fingers and put them in any openings between the flowers. Use a tiny bit of water or icing if required to aid matters stick.

Large Rose Petals It's possible to produce a large rose by tearing bigger strips out of a sheet of fondant and utilizing these to form petals rather than a whole flower. Do not worry if your strands are irregular, it is going to make the petals appear more natural once you place them together.

Placing the Rose Start by creating a small rolled rose for the center. Build up the blossom by wrapping more strips of fondant around the center great site. Let the fondant fold or tear if it wants to; your flower will look more organic if it is not entirely perfect.

Finished Rose Continue adding petals until the whole surface of the cupcake is covered. If it seems too flat, give the petals more body by simply including a fold or ripple as your wrapping them about.

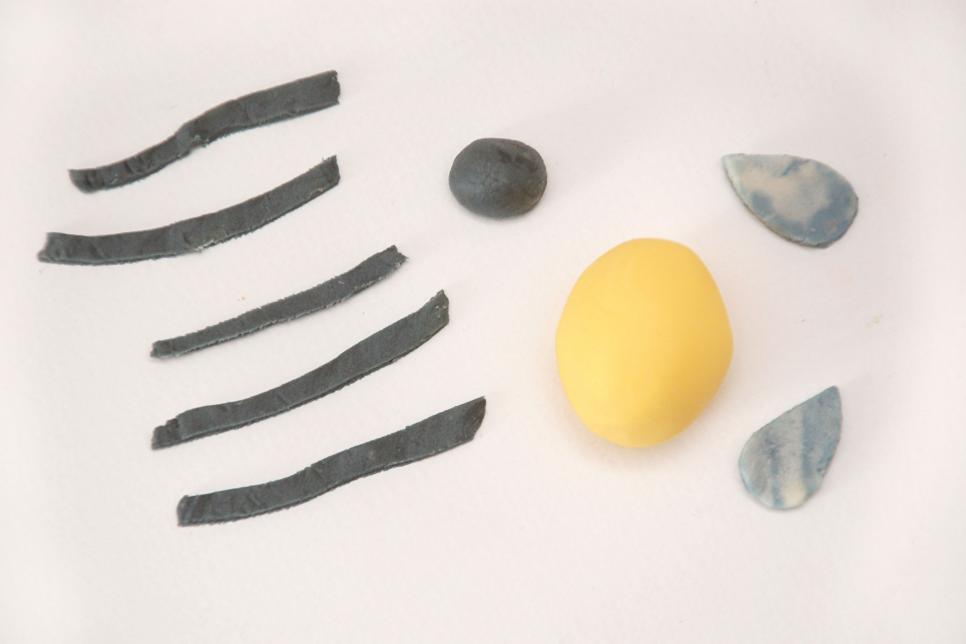
Bumble Bee You might also create smaller flowers utilizing the exact same technique you use for the significant rose, but using little flowers it is possible to leave space for a bee! Start with the same contours you would use for your own ladybug, a yellow oval for the body and smaller grey oval for the head Going Here have a peek at this website. Cut stripes from a sheet of gray fondant and small wings from a sheet of marbleized blue and white.
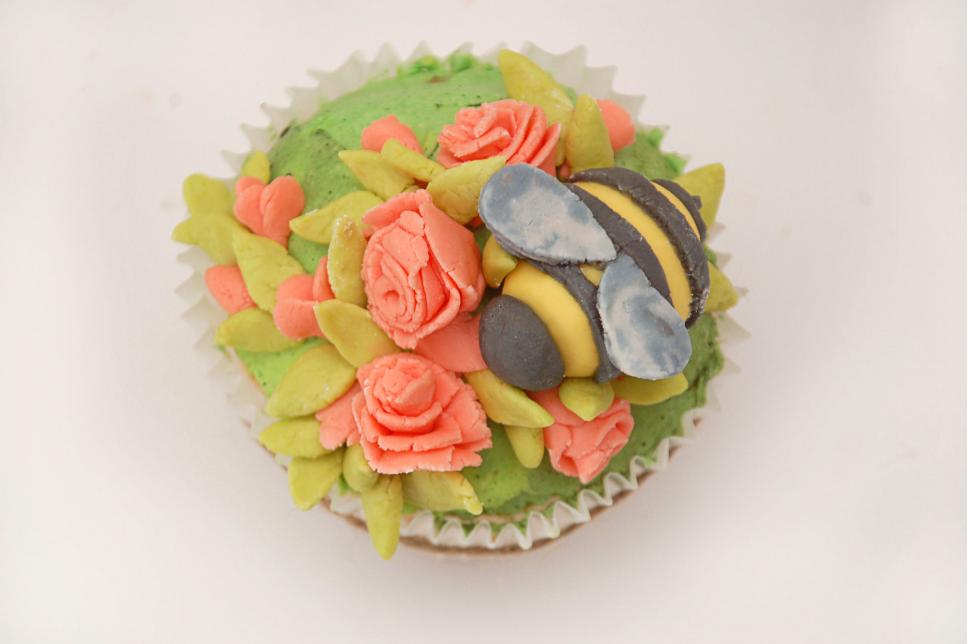
Bee from the Roses Top a cupcake with a string of smaller roses and place the bee among them. You are able to combine methods for roses with several petals and rolled roses to produce complete buds and flowers important site my website. Add a few leaves to fill in the surrounding region.
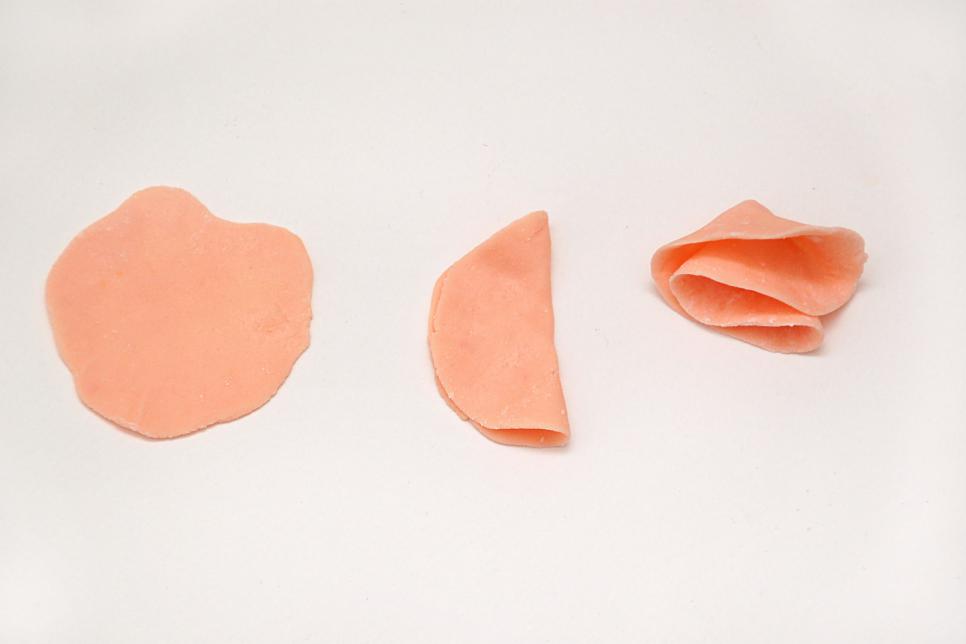
Folded Petals You may create beautiful and very round flowers simply by folding a couple of parts of fondant. Roll a sheet of fondant on your preferred color and cut out circles out of it. You can use a cookie cutter to get perfect circles, but we cut pristine circles freehand. Cutting circles that aren't quite perfect will give your petals more variety and create the last blossom more organic. Instantly fold your circles into loose quarters look at this web-site. If the fondant gets overly dry before folding it will crack.
Organizing the Petals Place your loosely folded petals in a ring around your cupcake together with all the folded corners pointing. Add another layer of petals on top of these, all of the way round basics. Now you can choose if you would like to finish out the flower or add a butterfly.

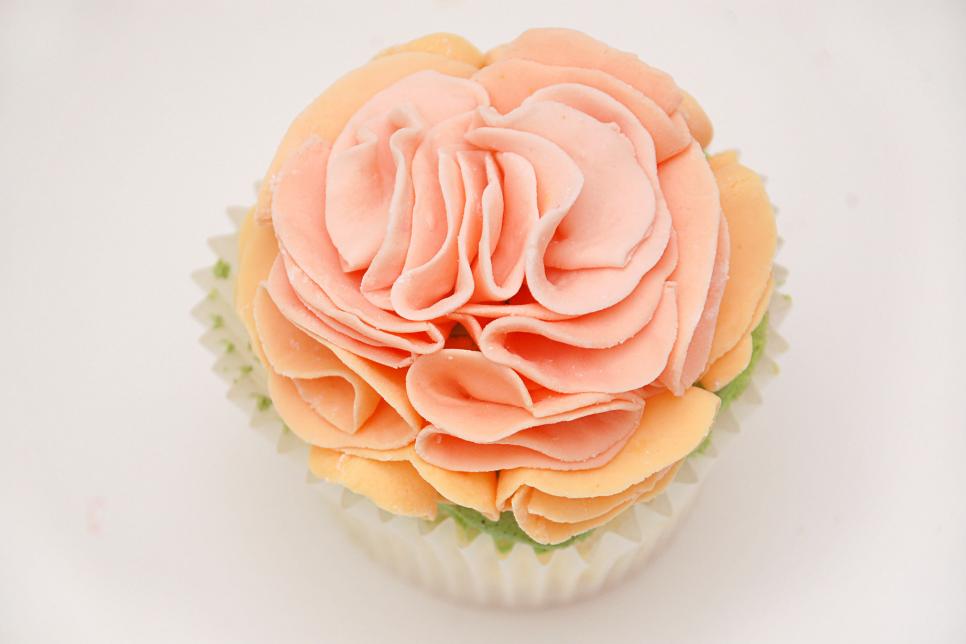
Finished blossom To complete the flower simply continue adding layers of petals until the centre is complete and the cupcake is coated. We utilized a gradation of colors for ours, beginning with cherry blossom at the bottom and moving to light pink in the center. This is one of the fastest ways to build flowers.
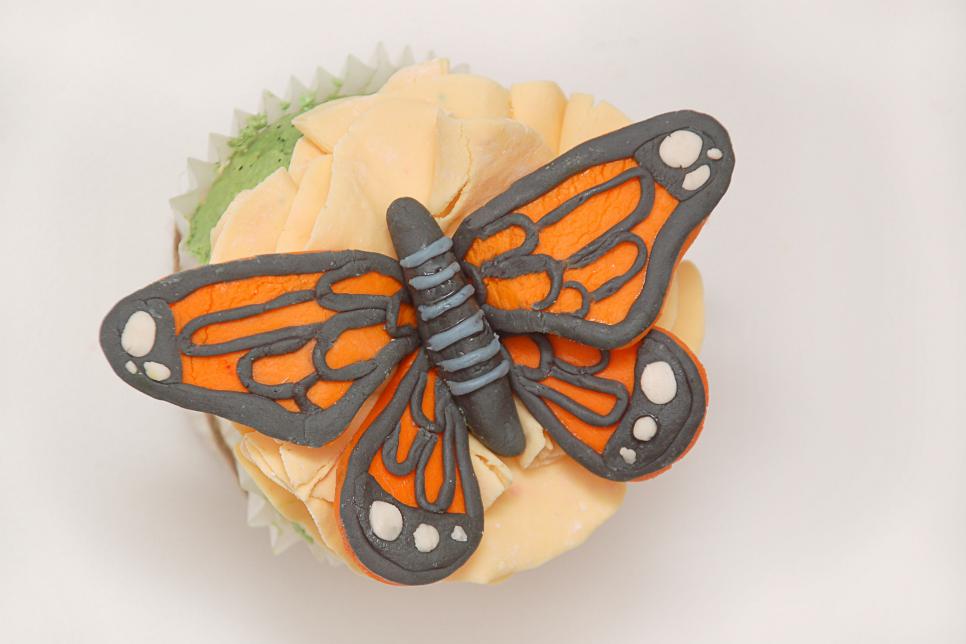
Butterfly Shapes Rather than finishing the entire flower with petals, you can top your cupcake with a gorgeous butterfly. To create our monarch butterfly we cut wing contours from a sheet of orange fondant. (If you are concerned about getting the shape right, try tracing a photo.) We also used a fat grey log contour for the body and plenty of little ropes. A couple white circles are perfect highlights.

Finishing the Butterfly Placing all the butterfly bits together can be tricky, but plenty of fun! If you're opting for a particular butterfly be sure to check at a photo for a little guidance. Trace the exterior of the butterfly's wings black and fill the inside by producing loops together with all the thin grey rope. Insert white stains to the ends of their wings and grey stripes to the body for a perfect finishing touch! You are able to create any type of butterfly this way, simply vary the color and wing shape.
Done! Now you can organize and serve your beautiful cupcakes. Although these cupcakes aren't too difficult to create, they do take a lot of time. If you are going to generate a lot be sure to do a couple tests ahead of time so you can plan accordingly.

No comments:
Post a Comment