
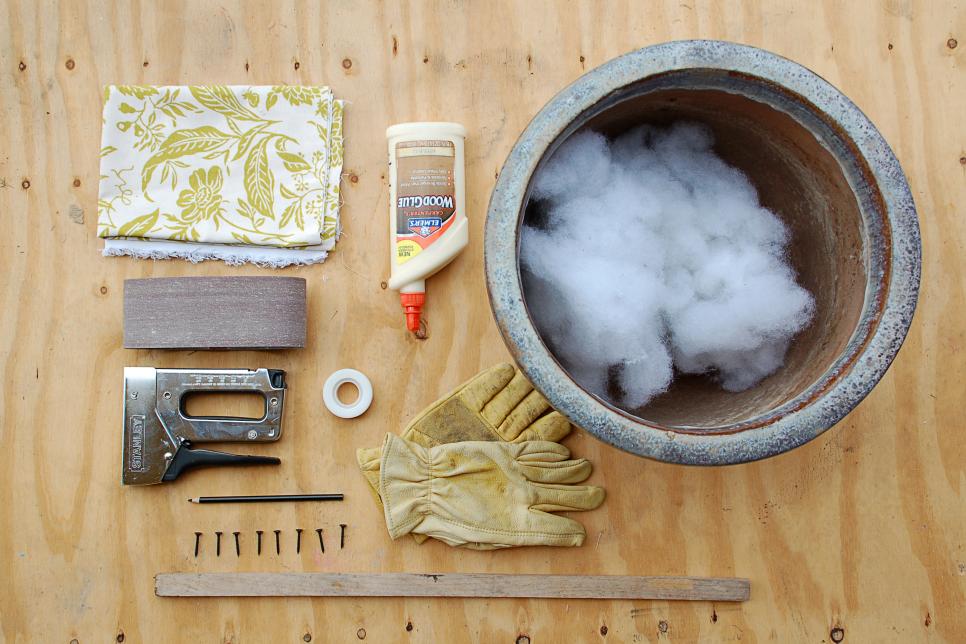
Provides To make your own storage ottoman you will require a large clay planter. It is possible to use a plain terracotta pot if you like, but take the chance to choose one of these gorgeous glazed ones that you've had your eye on. Choose a heavyweight floral fabric in colors that compliment your bud, and stuffing to your cushion. For the building of your ottoman cushion you'll need plywood, at least 4 ply and large enough to cover the top of your kettle with some overlap, as well as a narrow board to create the lip, roughly 1 inch by half an inch. You will also need wood glue, a new roll of tape, a pencil, screws, work gloves, staple gun, power hand saw and adhesive or power sander.
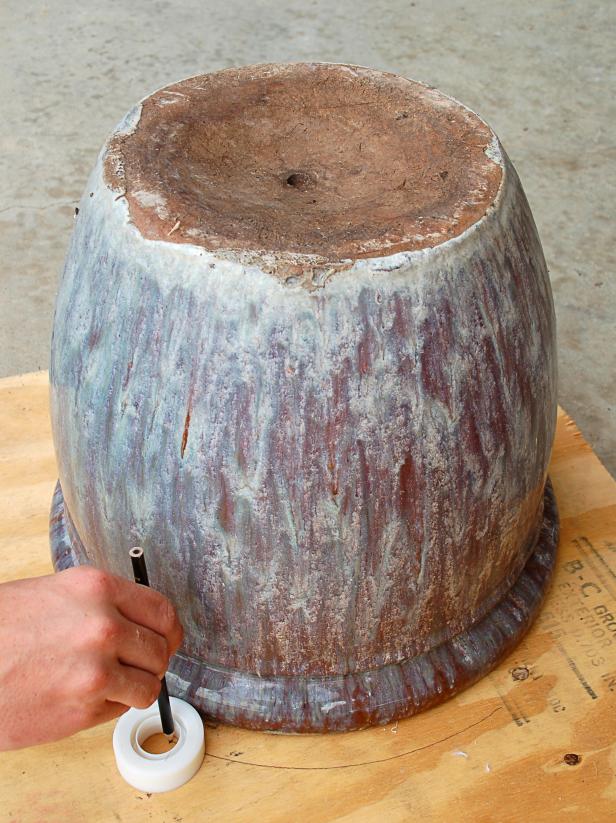
Developing a Guideline In order to cut a ring from your plywood, you will need to first draw a guideline More about the author. To do so, turn the pot upside down and put it on the board More Bonuses. Lay your brand new roll of tape apartment on the board so it touches the edge of the pot. Put a pencil at the middle of the roll of tape and press it against the edge closest to the pot so you are pushing the roster tape from the pot. Draw round the pot, letting the tape roll around the border as you move the pen. This will give you an even principle of the ideal size and contour.
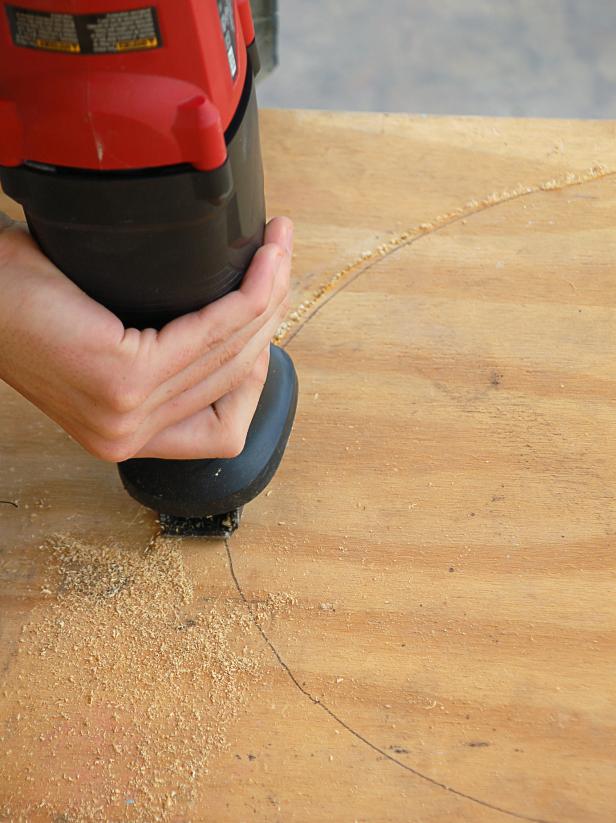
Cutting The Board A jigsaw works great for cutting the curve required for this undertaking, but you might also use a reciprocating saw. Cut along the outside of this curved line you drew. Err on the side of cutting on your circle too large rather than too little. Once your circle is cut, sand down any splinters and rough edges Website. Make sure you wear eye protection while working with power tools, and take all essential safety precautions.
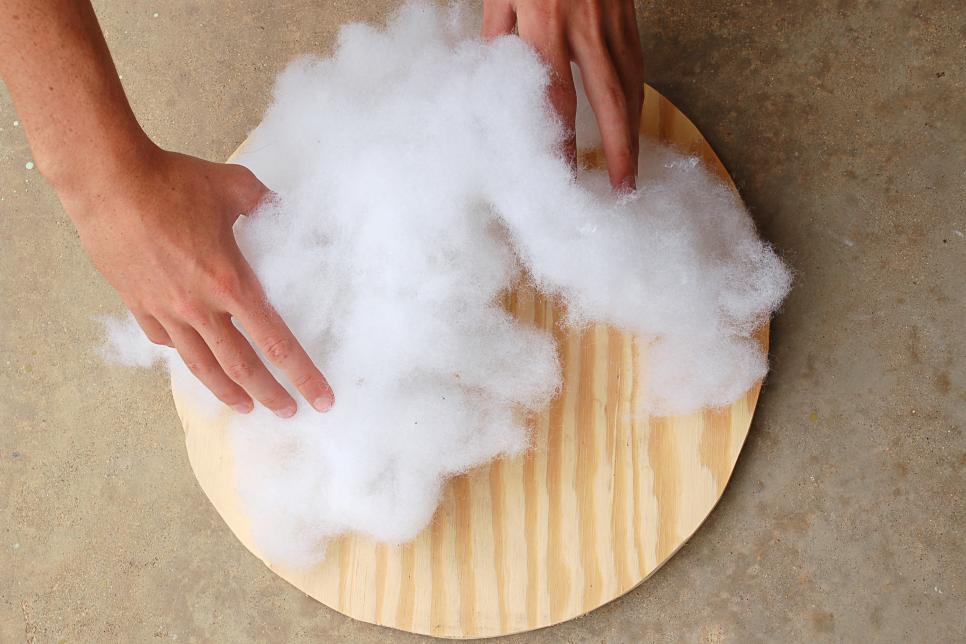
Stuffing The Cushion You are able to use many different different kinds of stuffing for your own pillow. You are able to cut down a piece of thick foam, use polyester stuffing, or recycle the filling from an old pillow or pillow. Use enough to cover the surface of the timber and allow it to be comfortable for sitting.
Stretching Fabric The quantity of fabric you'll have to cover your pillow depends on the size of pot you're using, but in case you aren't certain how much you will need it is safe to start with a lawn. It's possible to use just one piece of cloth or reduce and resew it to create a quilting effect if you like. Cover the stuffing with your cloth, and flip it over so the board is facing up. Pull 1 edge of the cloth over the back of the board and staple into the plank close to the edge important link pop over to this website. Pull the opposite border of the fabric tight round the board and staple it. Then proceed a quarter turn to the right and gently stretch and staple the fabric. Proceed to stretch and staple, moving equally back and forth across the circle.
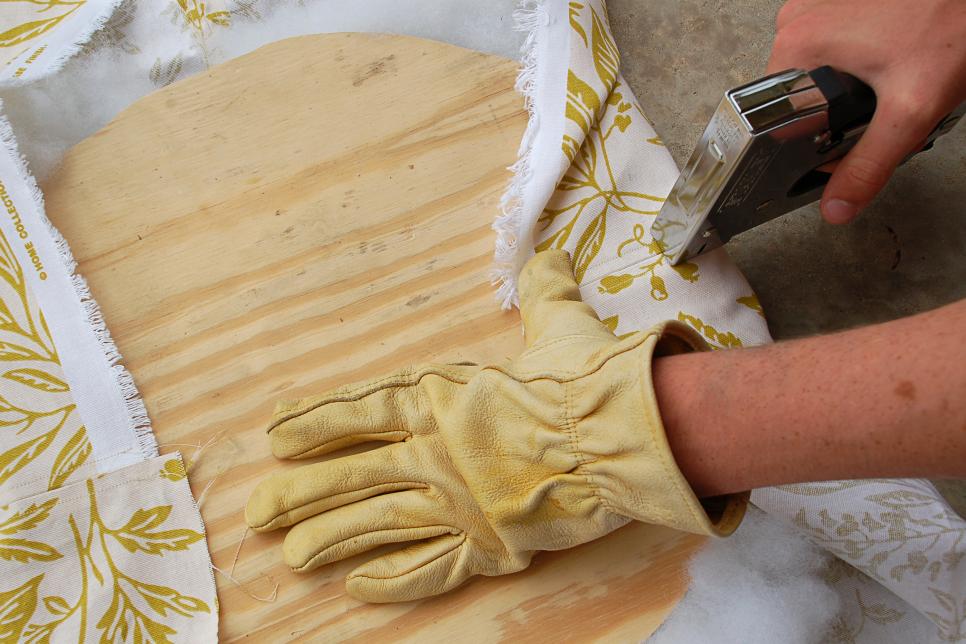
Staples and Glue As you proceed around the ring you'll need to fold the fabric to help it wrap tightly around the edge of the board. Add a bit of timber or multipurpose glue under the edge of the cloth for extra safety before you staple. Glue and staple until the fabric is firmly attached to the bottom of the board, and no pruning can flow out.
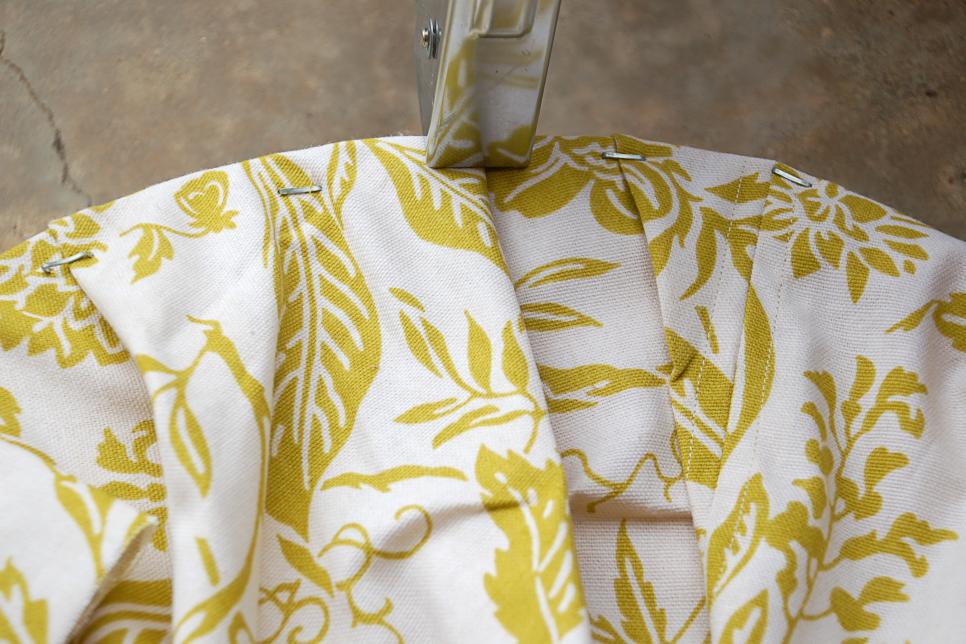
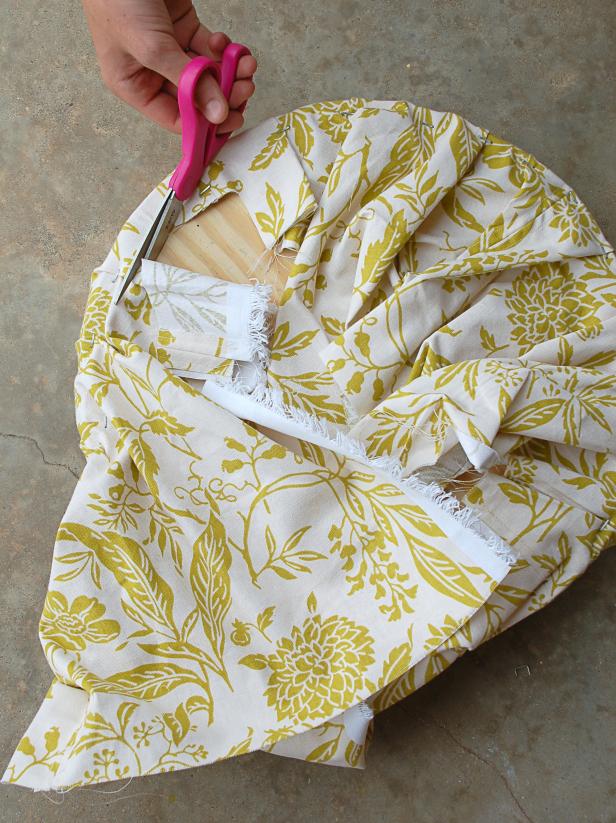
Trimming Fabric Once your cloth is securely attached, trim off all the extra cloth sites from this source. Use a little bit of glue along the raw edges to maintain the from unraveling, or fold them under and glue.
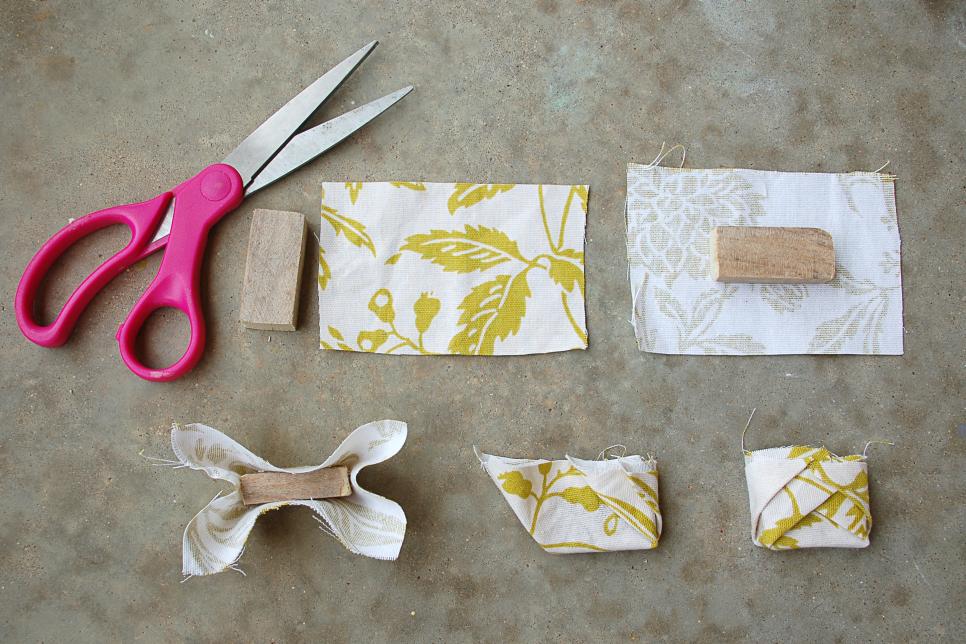
Cut Edge Pieces Now that your ottoman cushion is completed you will need to attach more bits around the edge to keep it from slipping off the top of the pot. You need to use at least eight bits, each about two inches long, but you can use more bits in the event that you'd like look at this site. Cut them out of your narrow board and sand down some rough edges.
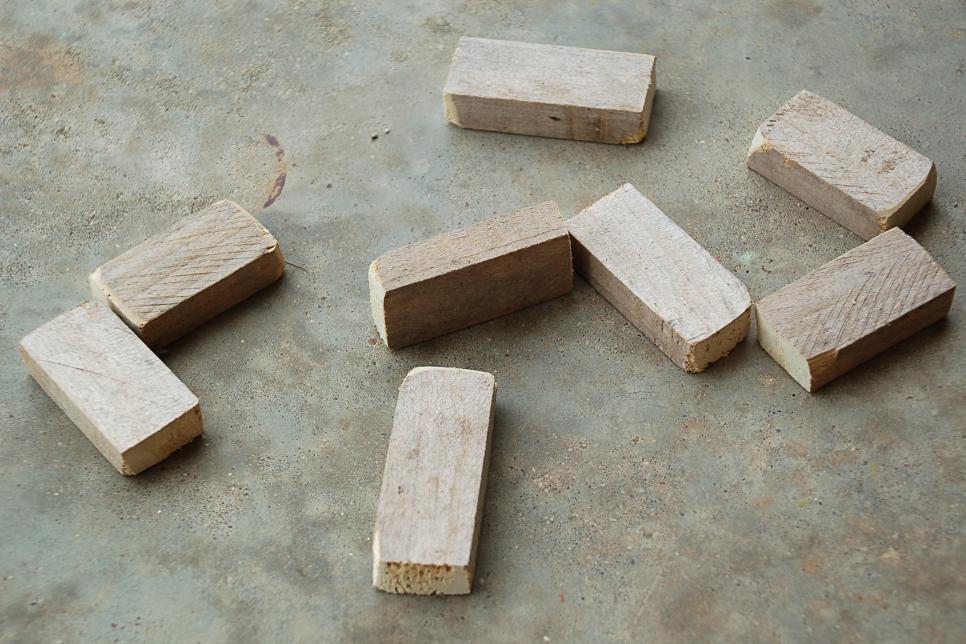
Covering Edge Pieces Use the excess fabric to cover your small wood pieces Bonuses. Even though you can wrap it any way you prefer, here is a quick way to add an extra decorative touch. Put your wood block in the center of piece of cloth large enough to completely cover it click for source learn the facts here now. Glue one of the long narrow ends at the middle of the cloth have a peek here. Add adhesive to the ends and sides of the block and then press on the faces of the fabric up against it to make four corners. Twist these corners in one at a time across the front and glue to fasten. Then fold the top closed to finish.
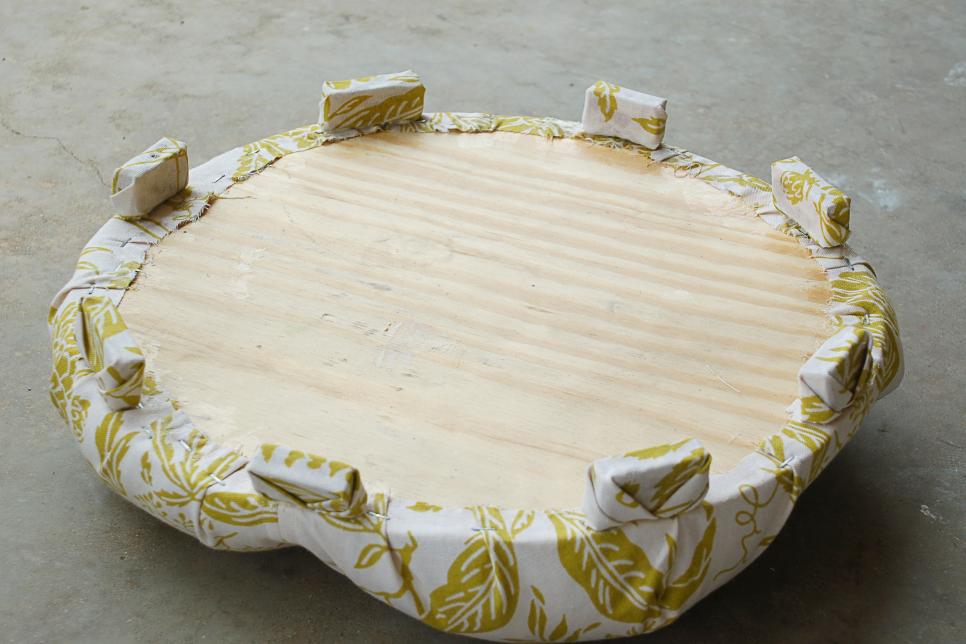
Placing The Edge Pieces Insert wood or multipurpose glue to the peak of every one of the wood pieces and put them evenly around the edge of the pillow with the ornamental folded side facing outside. Clamp each piece down and allow to dry for at least an hour.
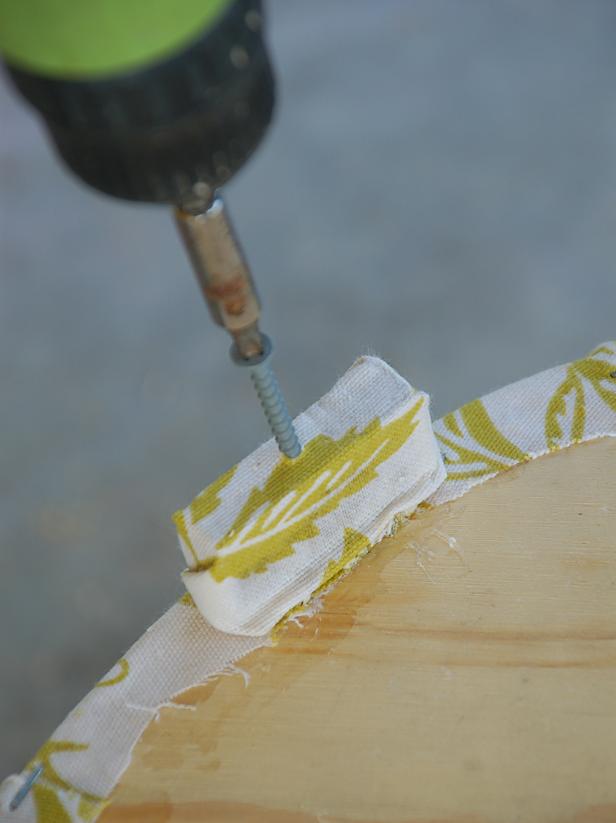
Screwing Pieces Together After the adhesive has set, secure the relation between the border pieces and the center cushion by screwing them together Discover More Here. You are going to want screws that are long enough to maneuver through the entire block of wood and to the plywood, but not so long as they move all of the way through the plywood. The exact length will depend on the kind of plywood you use and how big your blocks are, so step it out to make sure.
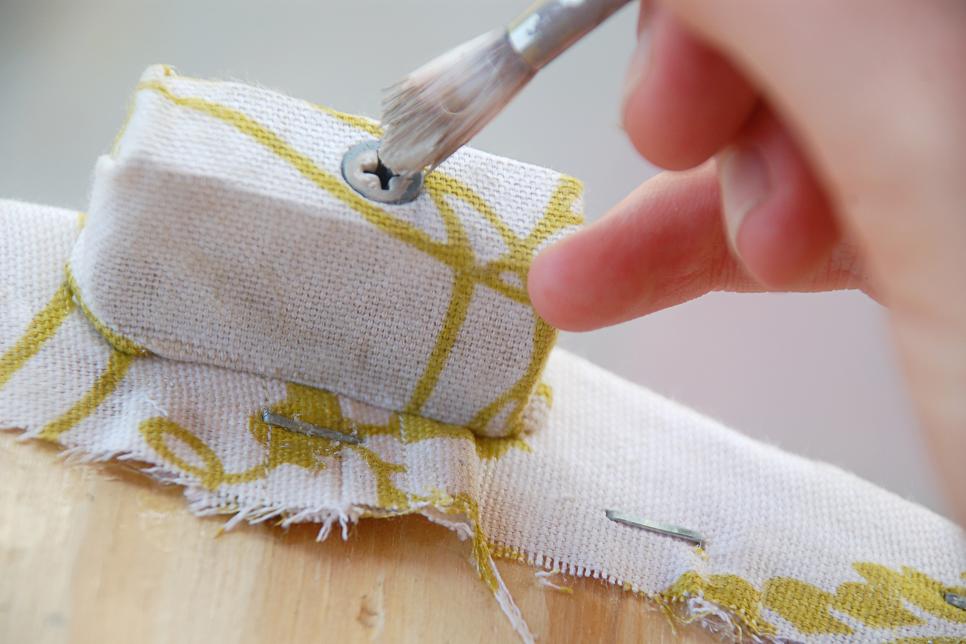
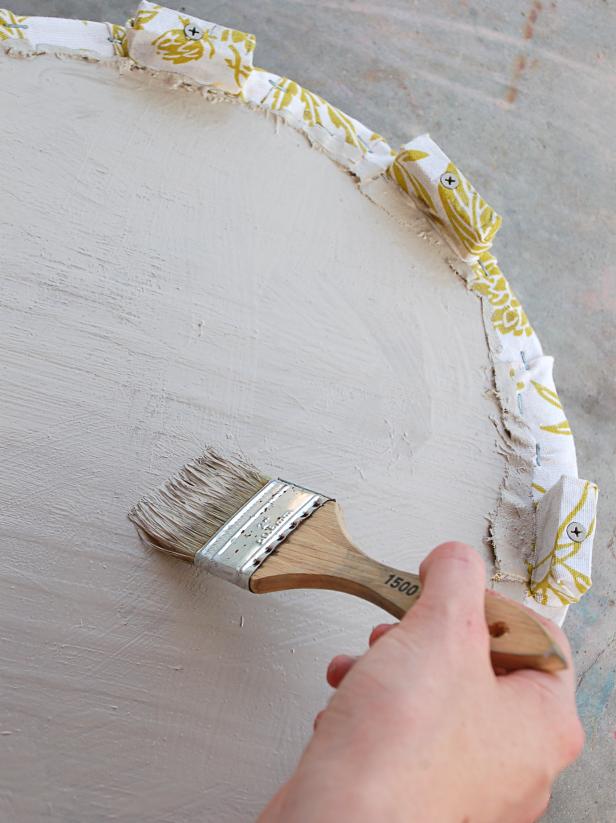
Painting The Screws Once all your screws are set up you'll be able to paint them to match with the background color of this fabric. Although this isn't mandatory, it's a nice touch that makes it seem a bit more polished.
Finishing Touches Last, you can paint the bottom of your pillow. Again, in case you aren't concerned about anyone seeing the bottom, you can skip this step. But if you are going to be raising it and putting things underneath everyday, the finishing touches can really make a difference.
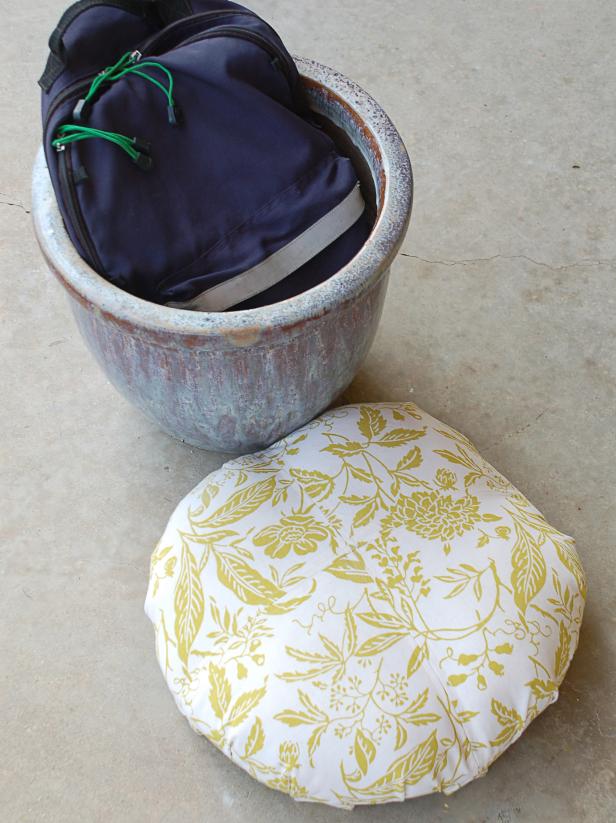
Prepared to Use! Let the glue on your own pillow dry for 24 hours, and it's ready to use. Place your floral cushion on top of your planter and imagine that those gorgeous flowers are growing from it! Whenever you will need a quick storage area simply remove the top, throw your things in, and then replace the cushion.
No comments:
Post a Comment