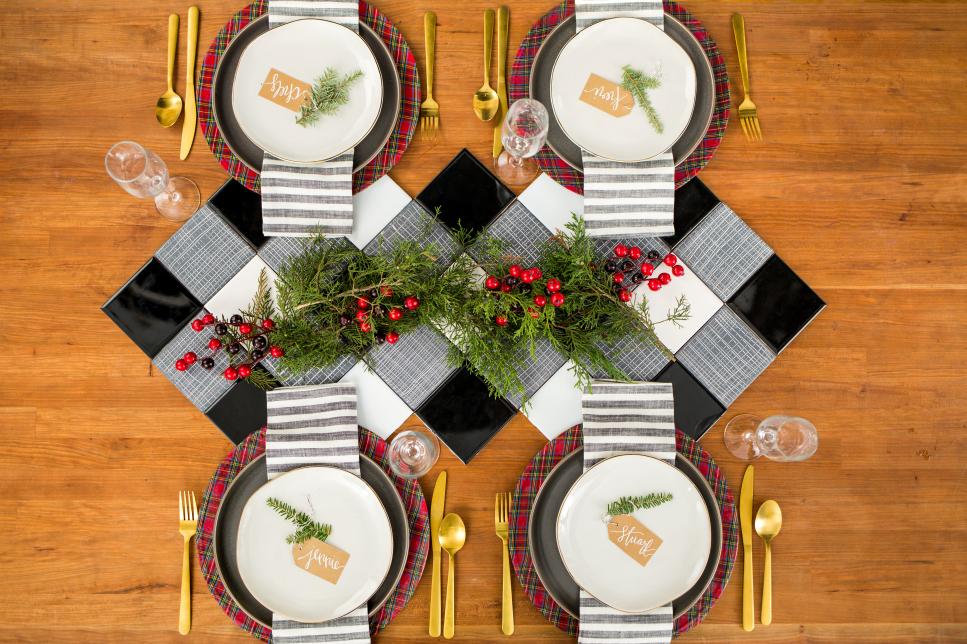
Step 1: Place Center Tiles With this project you'll need 29 4"x4" ceramic tiles: 10 black, black 7 white and 12 gray. To produce the plaid pattern look authentic, we painted white hatch lines on each gray tile using a toothpick and white acrylic paint. Once you've assembled all of your stuff, start the pattern by putting one white tile in the middle of your table, then encircle it on four sides with gray tile.

Step 2: Insert Black Tile Fill in the four empty corners with black tile until the pattern creates a diamond.

Measure 3: Continue Pattern Continue the pattern down the length of your table, until you've got 3 diamond shapes attached end to end. Fill in the empty spaces between the diamonds with the remaining white tiles.

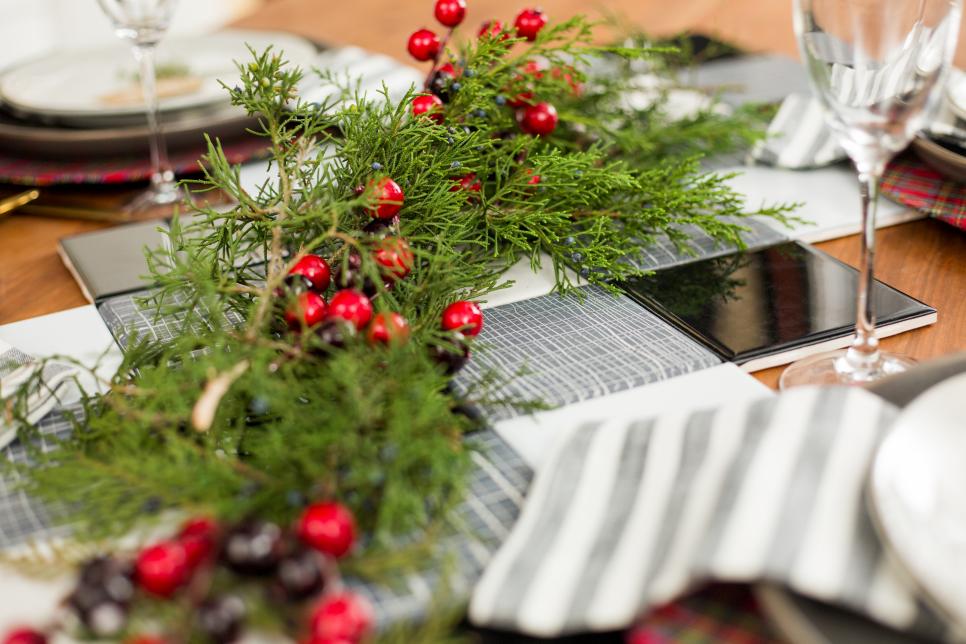
Measure 4: Pretty Up It If you are not planning to sit meals on the table, give your tile table a touch of holiday flair with evergreen clippings and winter berries.
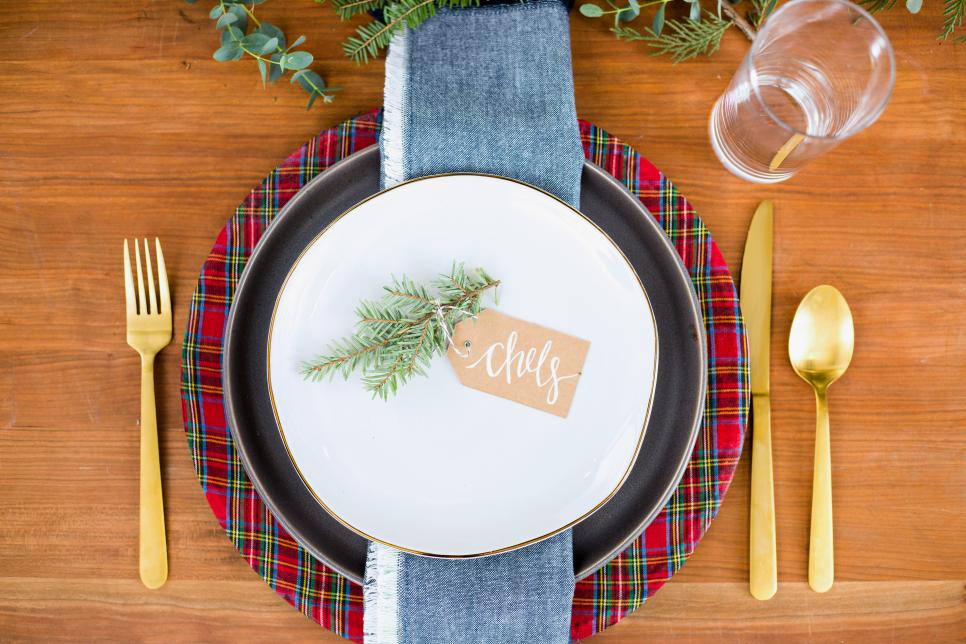
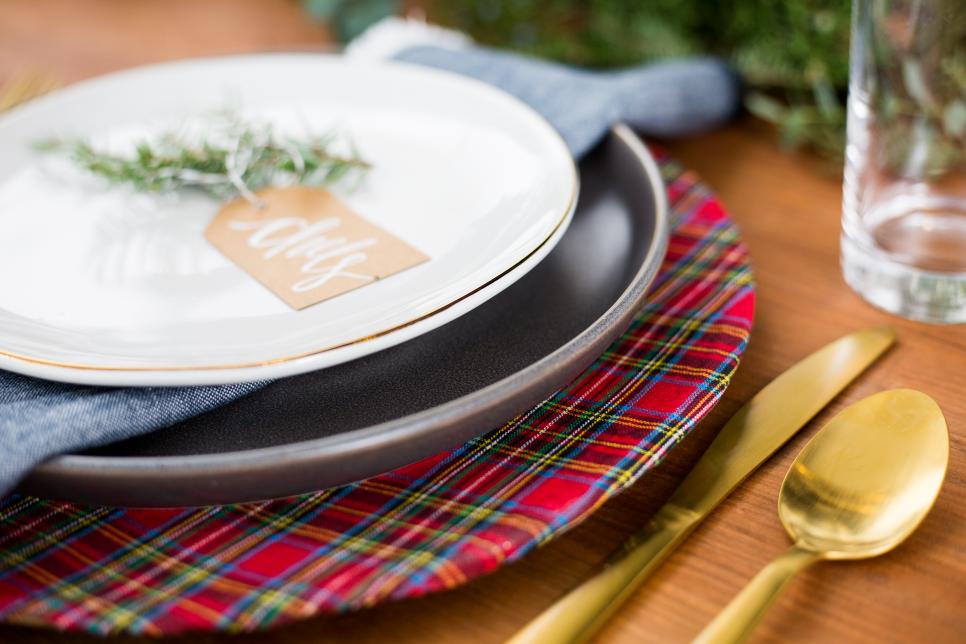
Step 5: Set the Table Finish off the look with neutral, stoneware-inspired plates, farmhouse napkins and tartan chargers (learn how to make these following).

DIY Plaid Chargers for Less Than $2 These plaid chargers might look expensive, but they are actually made from plastic dollar store chargers, inexpensive tartan cloth and decoupage glue! Continue reading to learn how.
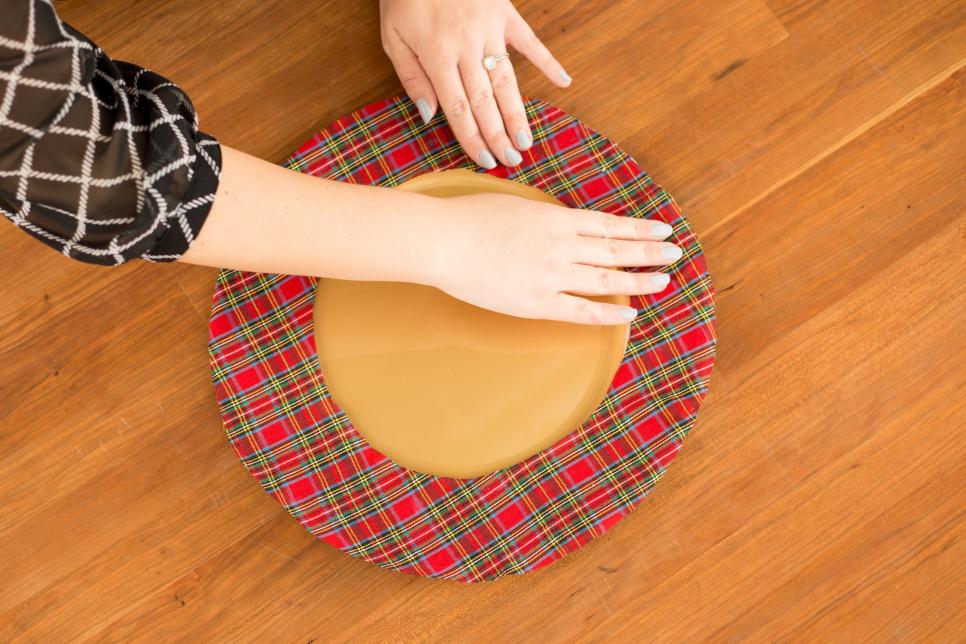
What You Will Need For this project, you'll need a sheet of plaid fabric, an inexpensive plastic charger (we discovered this one at the dollar store for $1) and a salad plate about the exact same diameter as the inside rim of the charger.

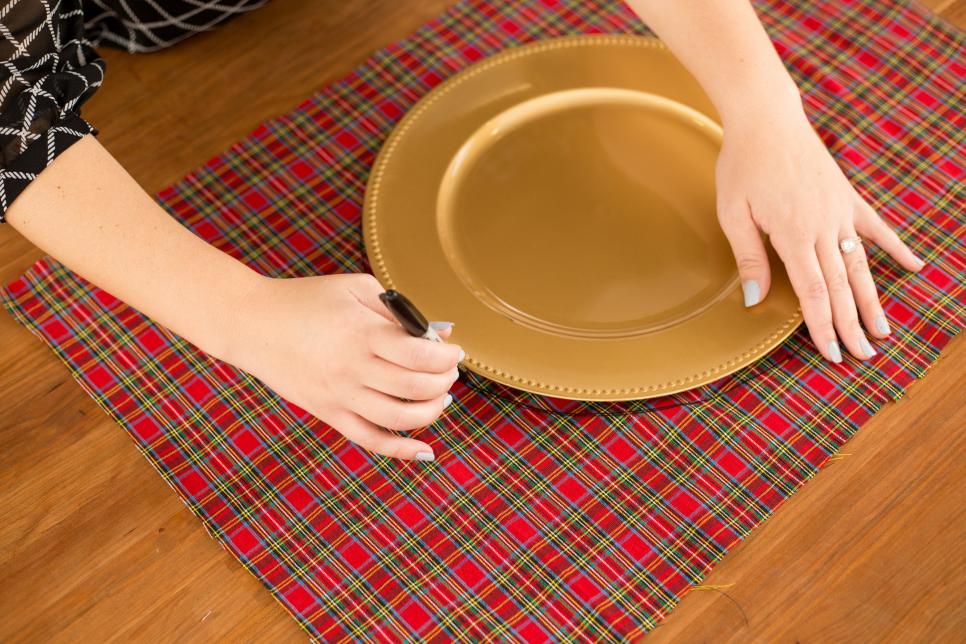
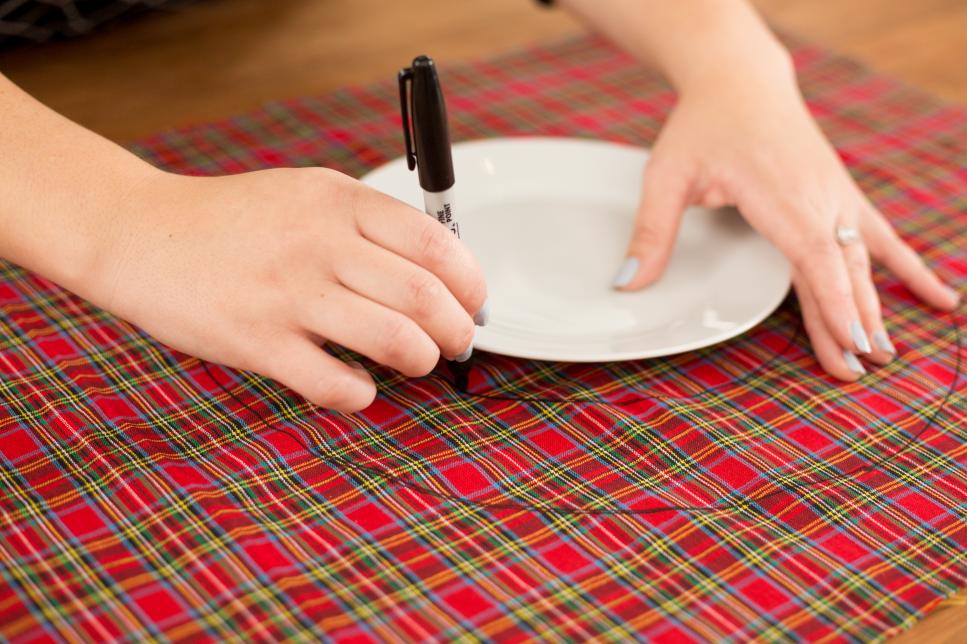
Step 1: Trace the Charger Put the charger in the middle of your fabric and track gradually around it using a permanent marker, being careful not to snag the fabric.
Step 2: Trace Salad Plate Place the salad plate in the center of the big circle and then trace with permanent marker.
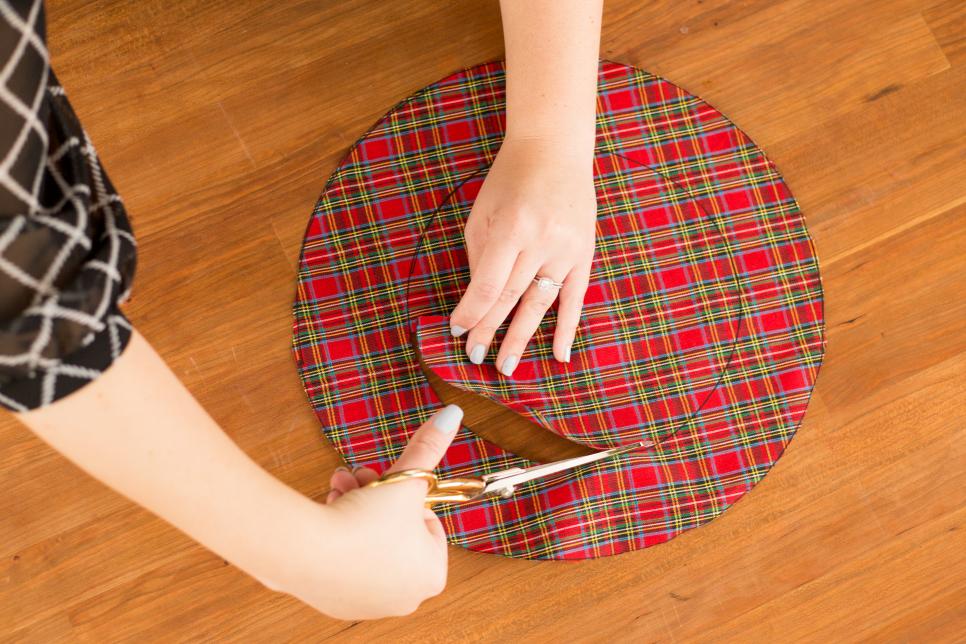
Step 3: Cut About Perimeter Using sharp fabric scissors, cut away excess fabric from the outside of the exterior circle.
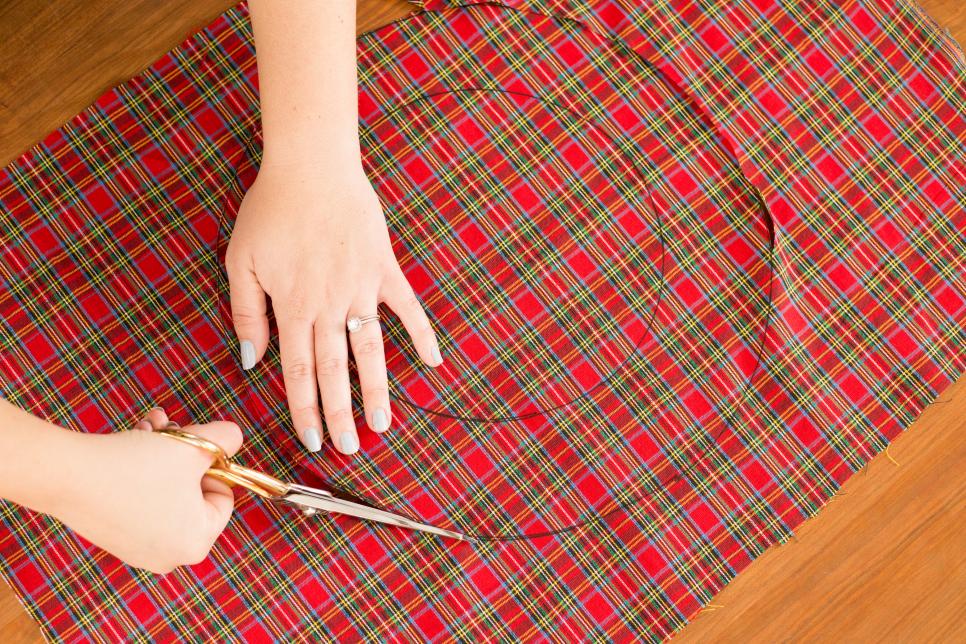
Step 4: Cut Outside Inside Circle Cut away the cloth inside the tiniest followed circle, leaving an "O"-shaped piece.
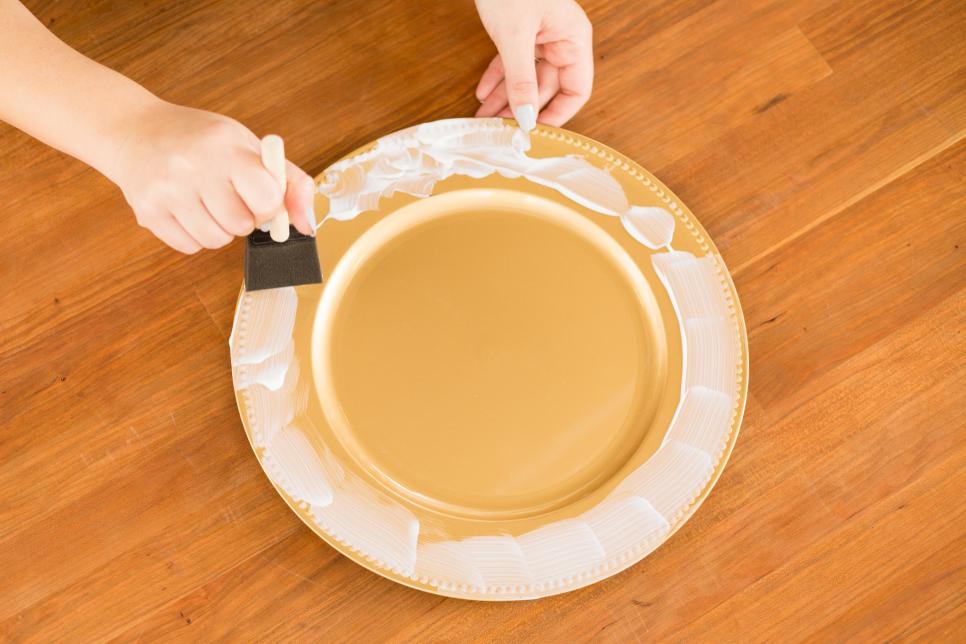
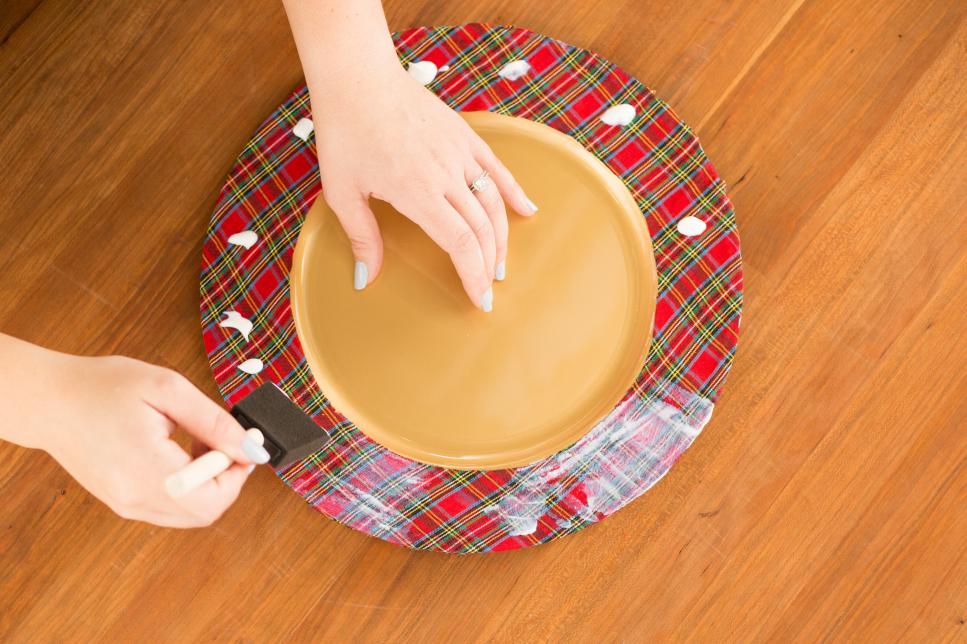
Step 5: Brush on Glue Brush a thin layer of decoupage paste on the rim of your own charger, letting it dry for about two minutes or until the glue is tacky. Ensure the glue spreads all the way to the inside and outside edges.
Step 6: Insert Fabric Carefully place your cut fabric on the glued rim, adjusting until it sits flush with the inside edge of the rim and covers all round the outside border. In case you've got excess cloth hanging over the rim, then no worries! We'll fix this later.
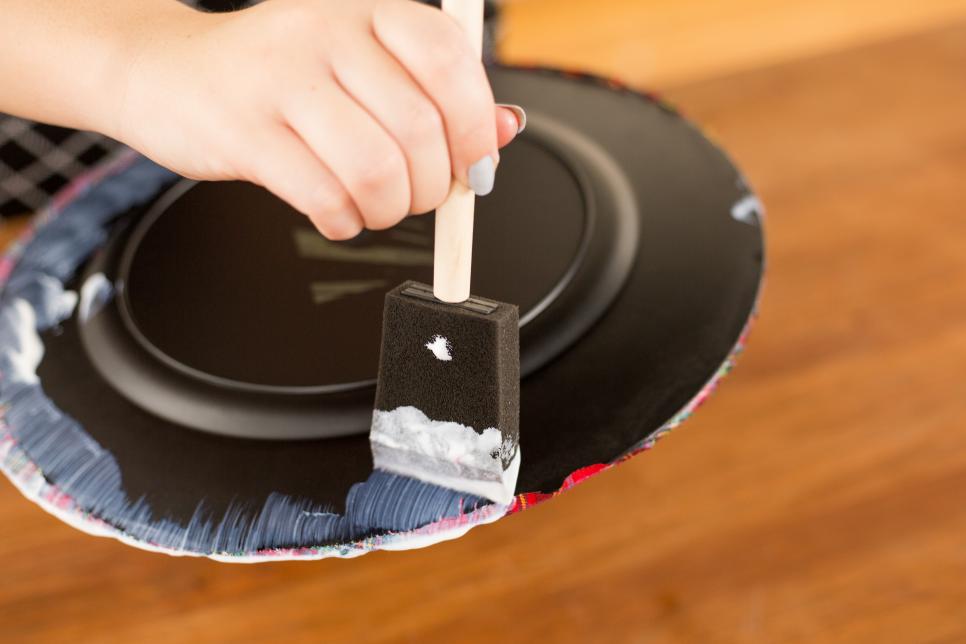
Measure 7: Glue Seal the cloth by spreading another thin coating of adhesive along the surface, paying careful attention to the edges.
Step 8: Seal External Edge Turn the charger over and use your brush to glue down any overhanging cloth to the bottom. Let dry for about 5 hours or even overnight.
Measure 9: Show It Off Set your stunning creation on screen at your next shindig and bask in all the compliments you'll receive! Keep reading to find out more strategies to deck your halls with plaid.
Use Up Leftover Wrapping Paper The simplest how to go mad for plaid? Fill an old picture frame with plaid or holiday-themed wrap paper in dark reds or moody blues, then use a chalk marker to sketch your favorite design or word on the glass. After the holidays are finished, just wipe away the mark with a moist paper towel and swap the paper out with picture-perfect memories from your holiday parties!

Pretty Festive Mix and match designs, colors and frames for a look that's uniquely you.

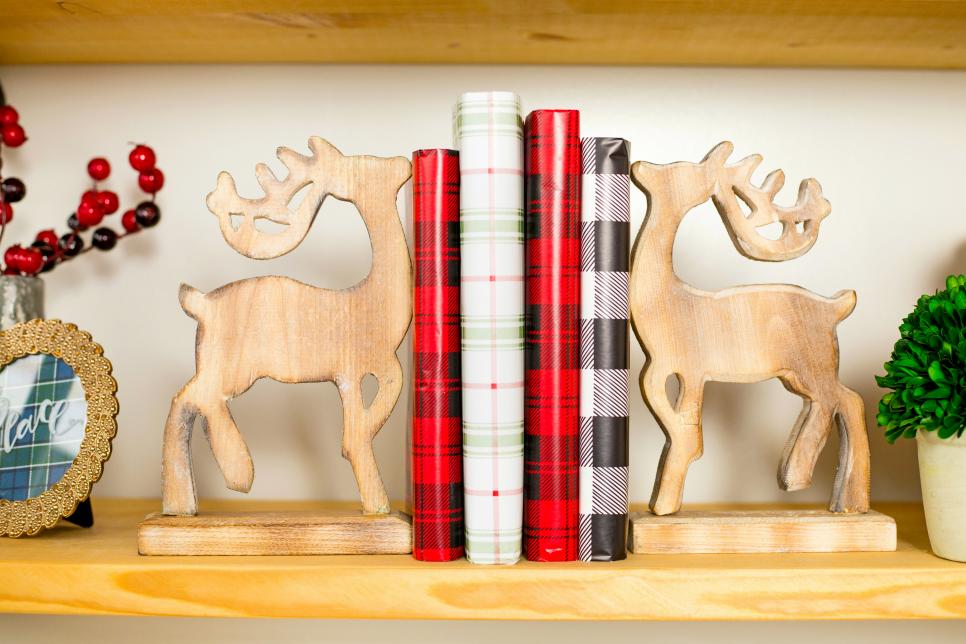
Wrap Your Books Switch your bookshelf into a plaid showstopper by wrapping your tomes (temporarily, of course) in leftover gift wrap.

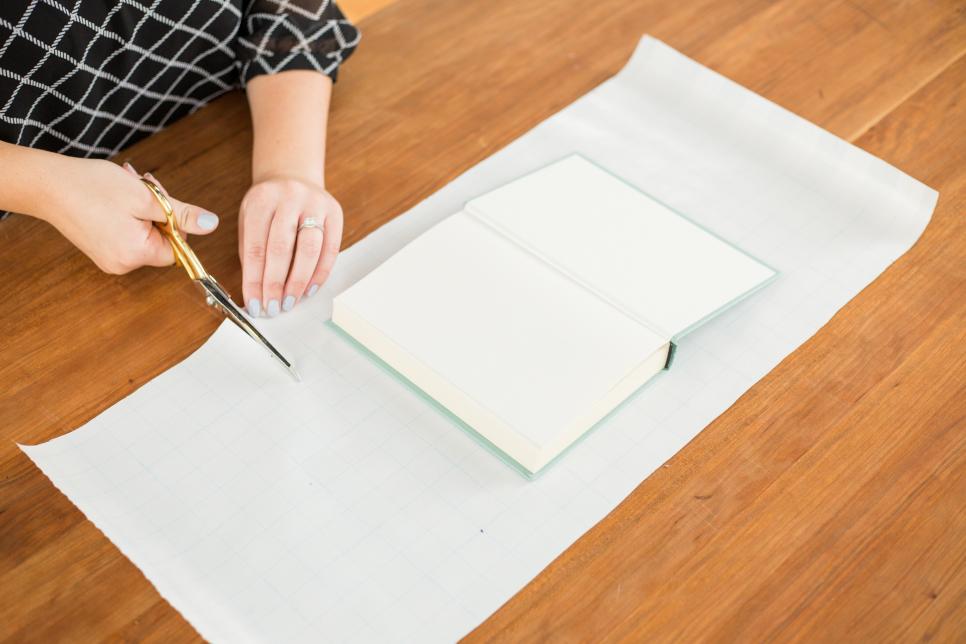
Step 1: Measure to Cut Horizontally Put a book in the middle of a piece of wrapping paper, making little marks two inches above and under every corner of this publication.

Step 2: Cut Use the guide lines on the rear of your wrapping paper to cut away the excess paper under and above the markings.

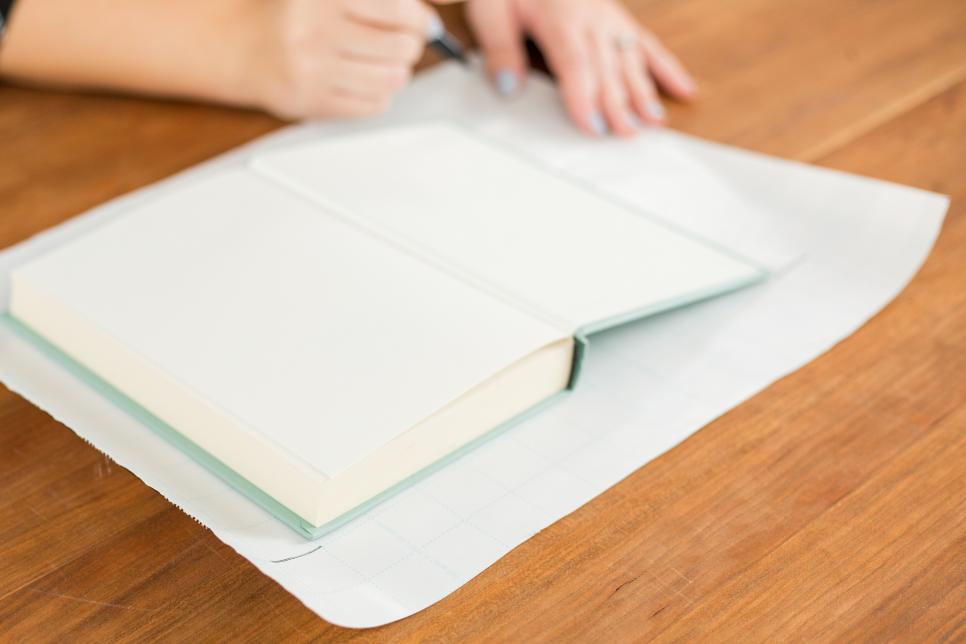
Step 3: Mark Cut Vertically Open your book and mark 2 inches out from the ideal side. Create a straight vertical cut at this particular mark.
Step 4: Cut on the opposing side Flatten your book so the front cover lays flat on the paper. Mark 2 inches out from the edge of the pay. Make another vertical cut at this mark.

Measure 5: Mark to Twist Create a short horizontal mark out from each corner of the book, then set the novel apart.
Step 6: Fold Fold the top and bottom of the paper in at the fold lines, creasing the edge sharply with your finger.
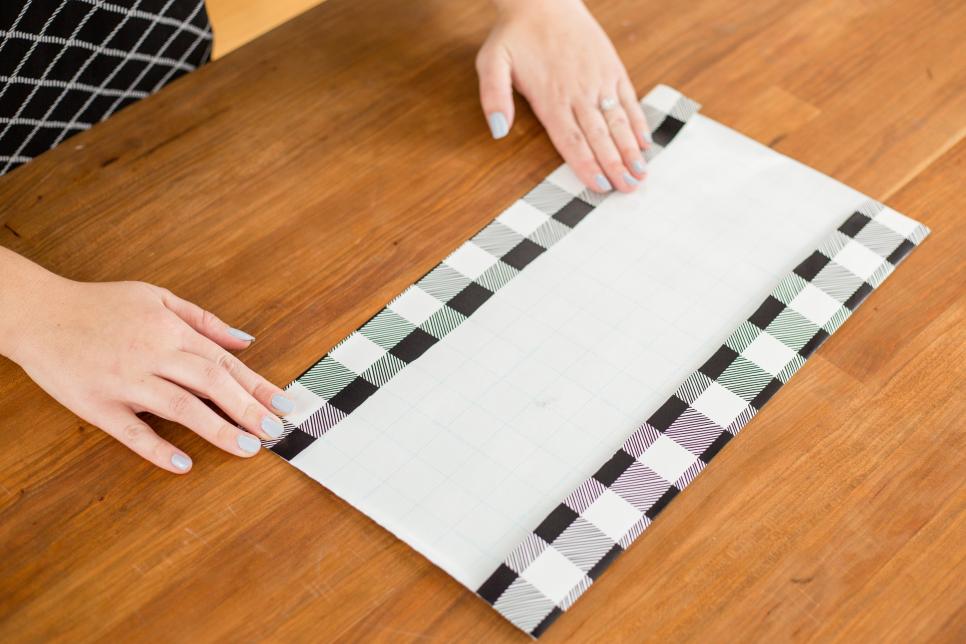
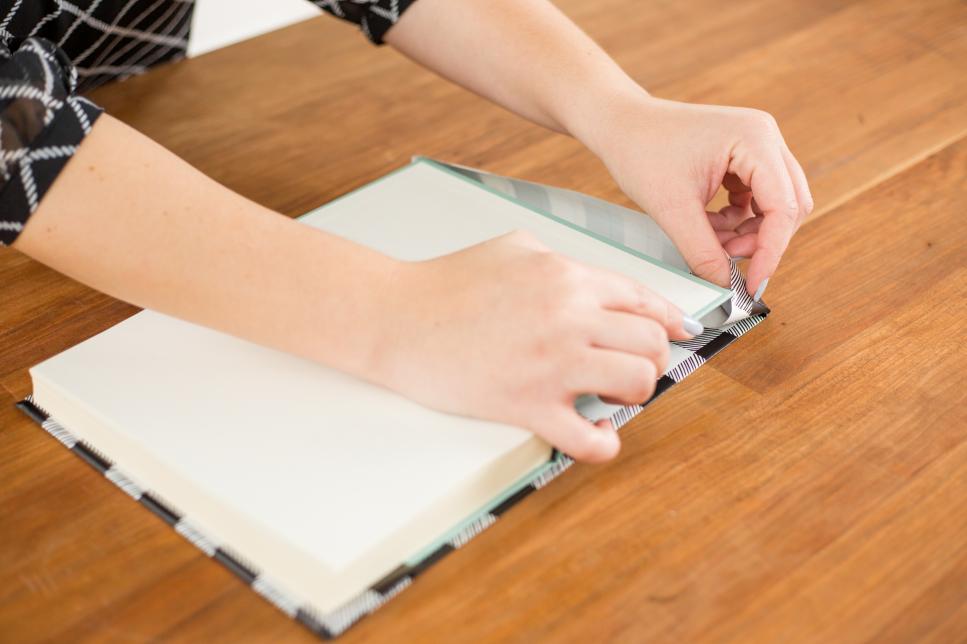
Step 7: Twist Vertically Put your book back at the middle of the paper. Fold excess paper toward the back of the book on either side. Eliminate book and sharpen the creases with your fingers. You should now see two small sleeves into which you can slip the publication cover.
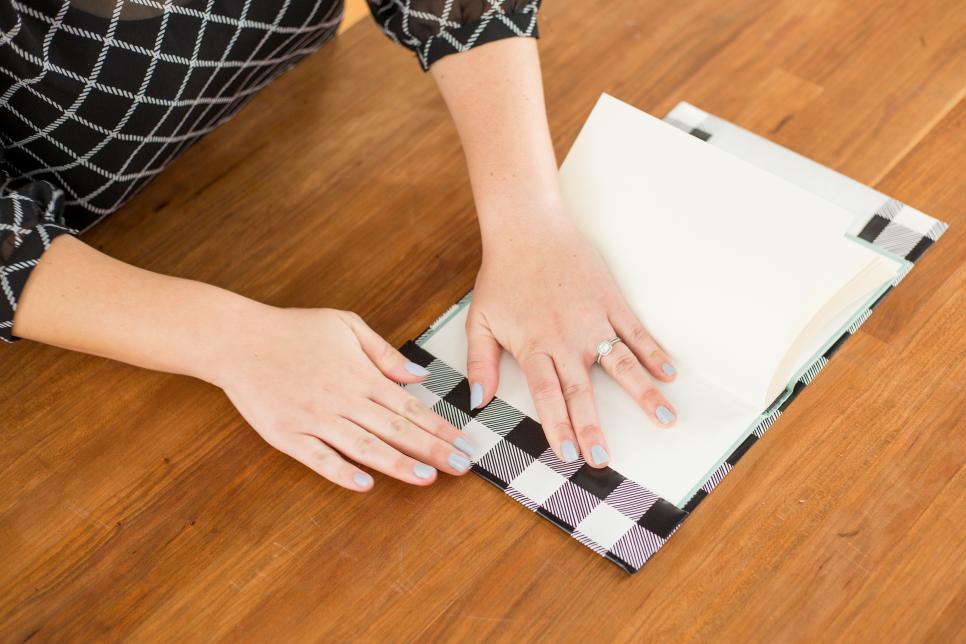
Step 8: Slide Book Into Sleeve Slip the front and back covers of this book into the sleeves, shut the book and place it back on the shelf.
Eye-Catching Screen Mix and match unique colours of paper and finish with festive bookends for a gorgeous display. If you plan to keep the covers longterm, write the title of every book on the spines in eye-catching gold or white mark.
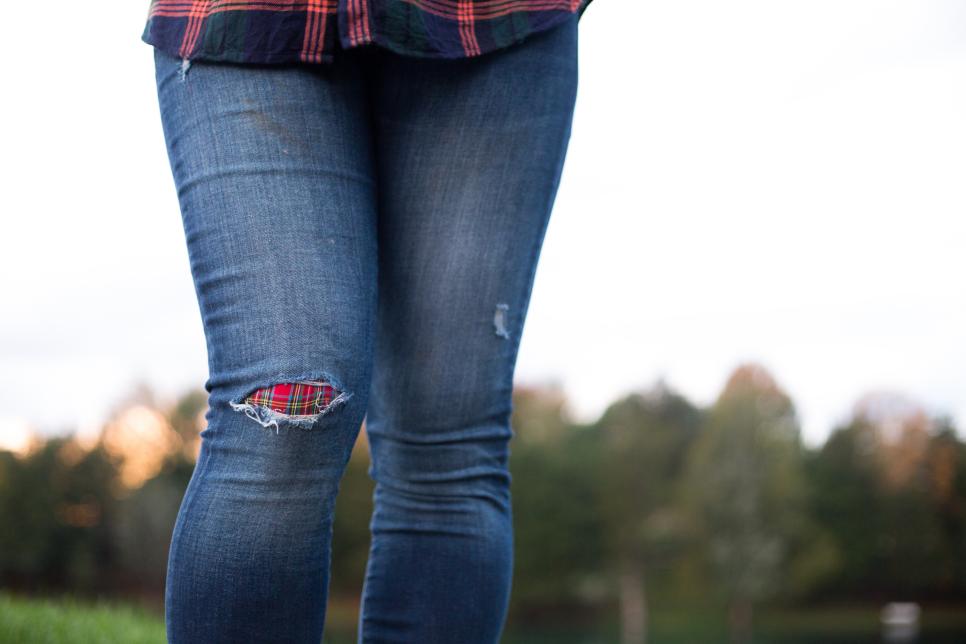
Patch Your Jeans With Plaid Have your favourite jeans seen better days? Give them new life by filling unsightly holes with chic plaid fabric.
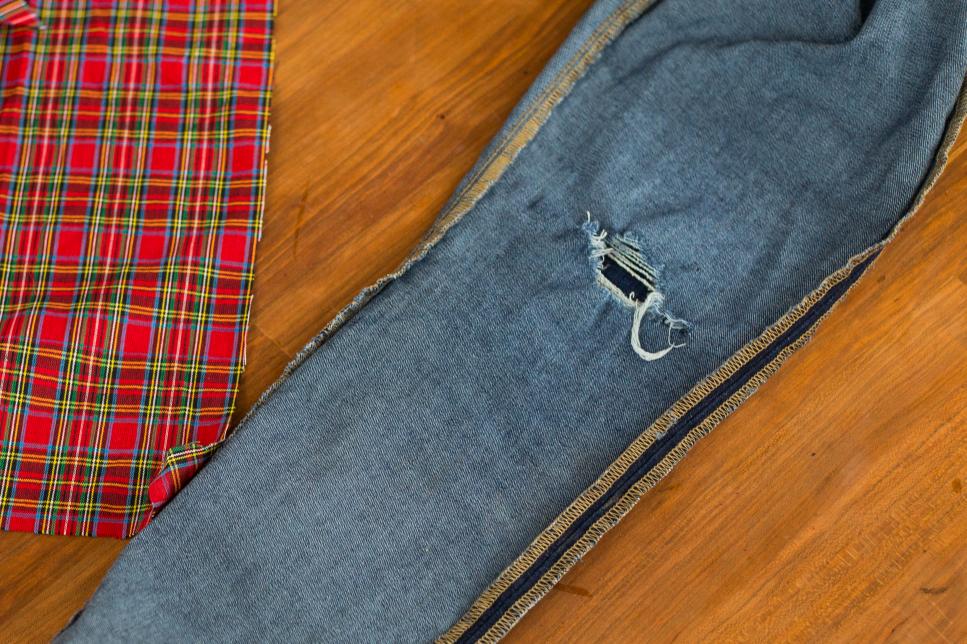
Step 1: Prep Fabric With this project, you are going to want conductive plastic cloth, iron-on hem tape, scissors and a iron. Turn your trousers inside out and cut the fabric in a rectangle only broad enough to cover all sides of the hole.

Step 2: Add Tape Measure and cut four pieces of hem tape to the length of each aspect of the cloth.

Measure 2 (cont.)
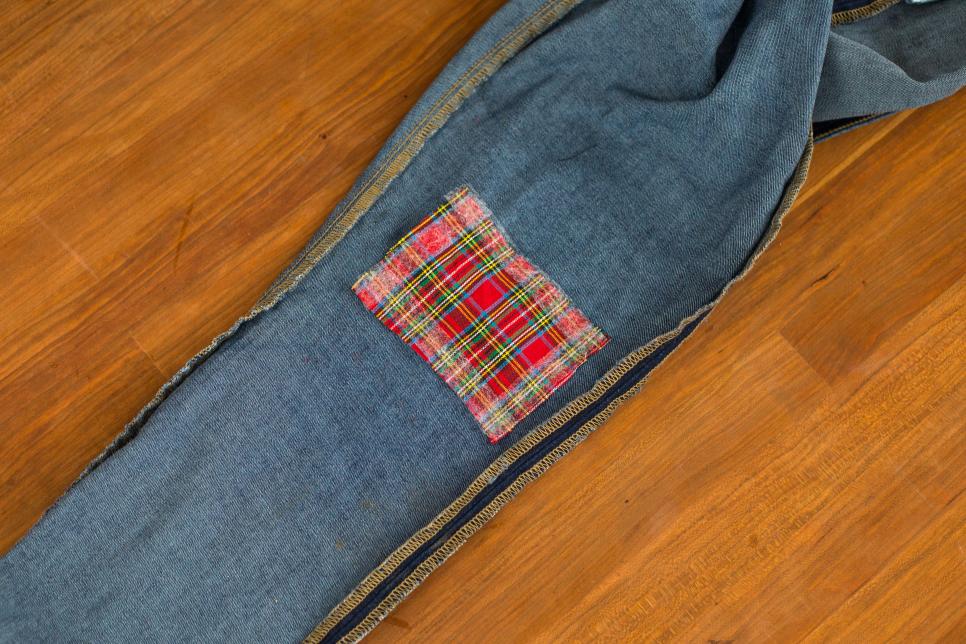
Step 3: Shift Iron Flip the fabric square over so that the tape is sandwiched between the jeans and plaid fabric. Adhering to the hem tape directions, iron the fabric until it sticks completely to your jeans. Let cool, then turn them right side out.

Plaid Fabulous Stone your new seasonal look with confidence!
Make Cafe Curtains Out Of Plaid Napkins Upcycle unused plaid napkins into stylish cafe curtains to your own kitchen or bathroom. All you need for this particular project is a tension curtain pole, two plaid napkins and a dozen curtain clip rings.
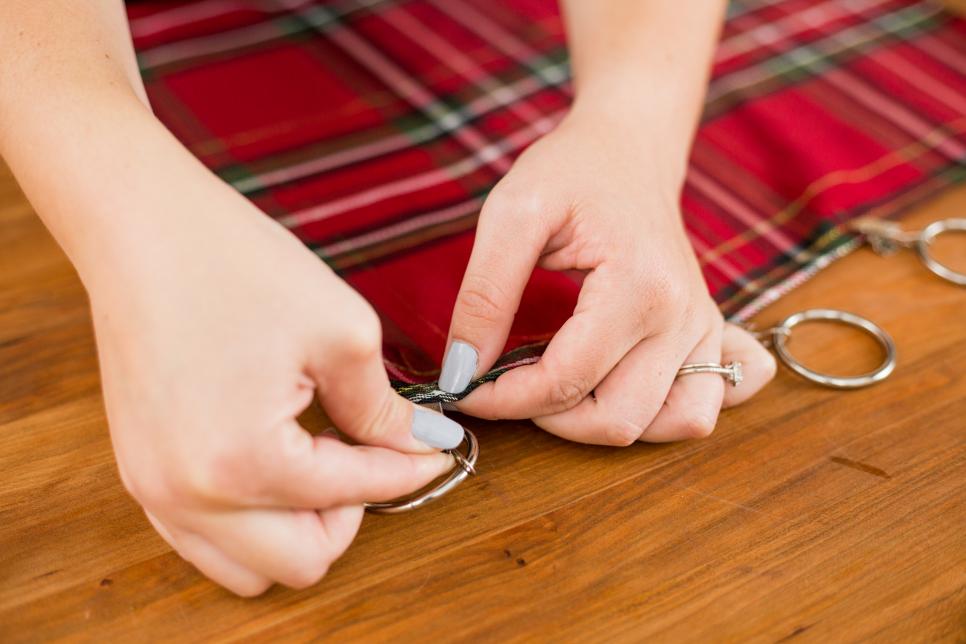
Measure 1: Clip Rings to Napkins Clip rings 3-4 inches apart along the length of the napkins. For a unique look, you may create unique kinds of pleats by pinching the fabric collectively between the clips.

Darling DIY Place a small tension rod in the middle of the window, just high enough so the cries kiss the window sill. Enjoy your plaid drapes all year long or swap out the napkins to get a new look each season.

No comments:
Post a Comment